Summary
The first few days of the month are spent training for the upcoming return to the Somme area.
On the 12th, Donald commands the 4th SAI in the action at the Butte de Warlencourt. The ultimate objective of the South African Infantry Brigade commanded by Brigadier H.T. Lukin is to take the Butte de Warlencourt, but the first objectives are to take the two German held Snag and Tail trenches that join at the German stronghold known as The Nose.
Diary
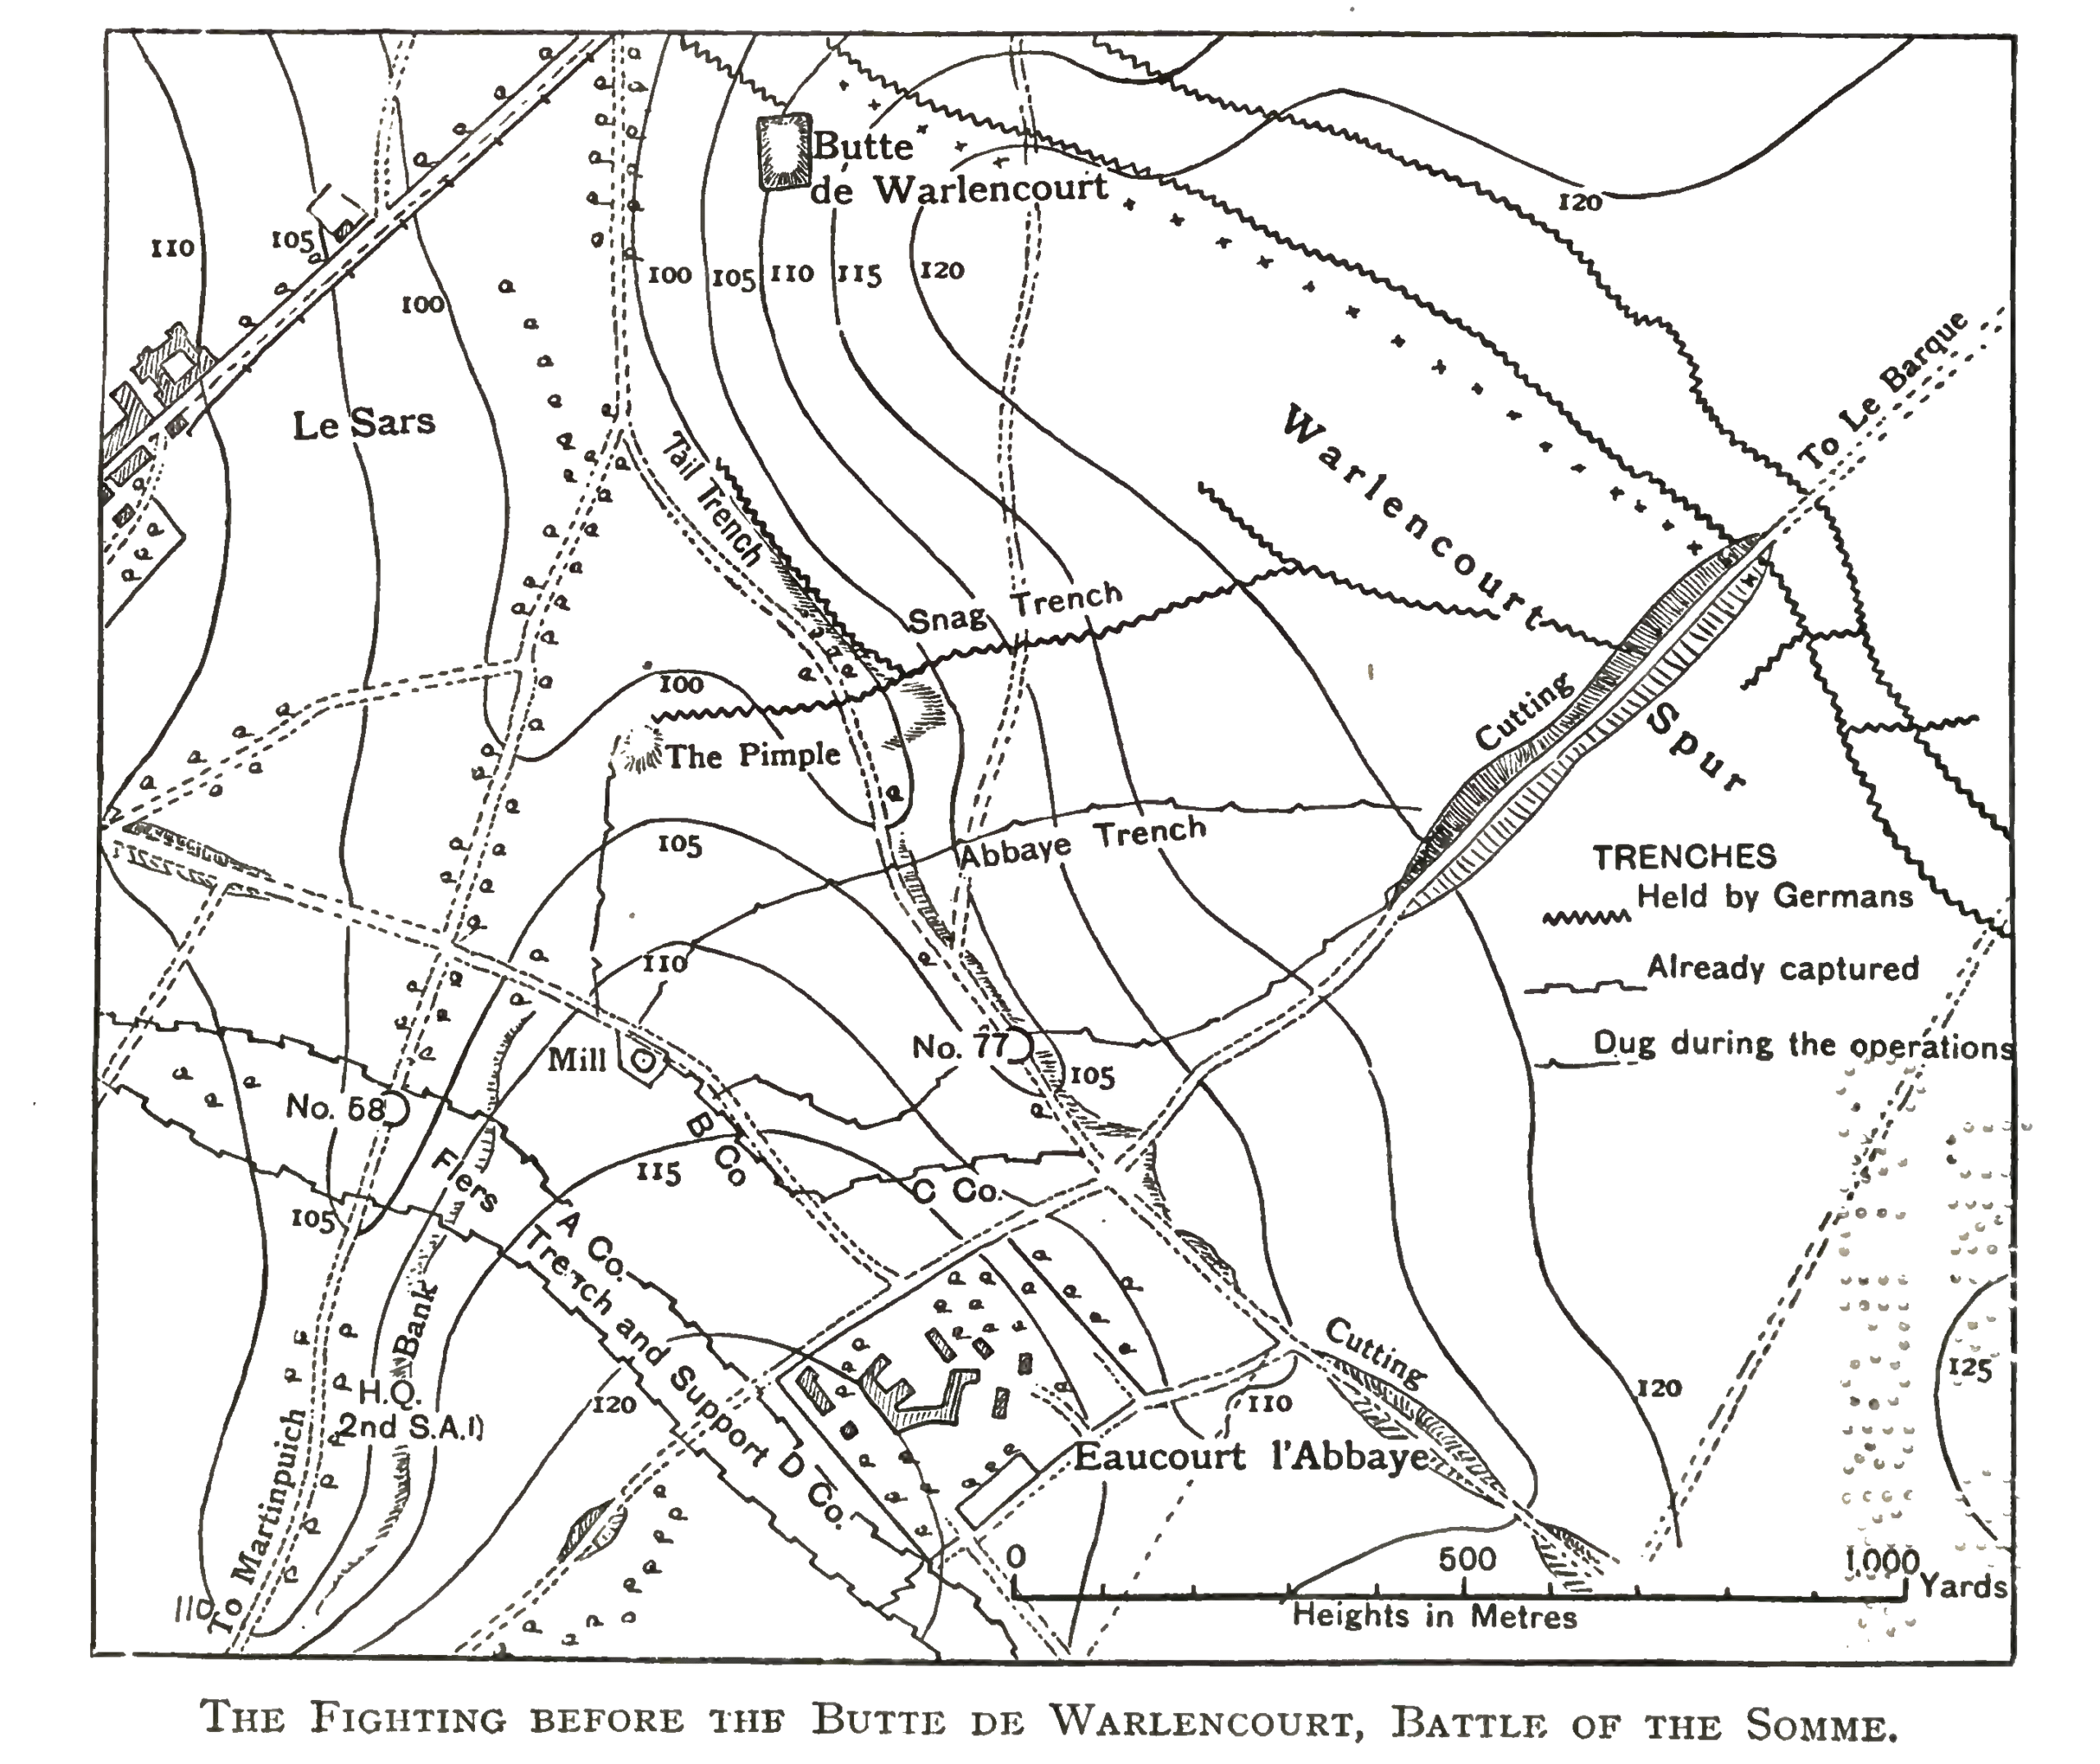
The diagram shows a detailed view of the area in question. The South Africans’ initial position is near the mill that is shown in the upper part of the lower left quadrant of the diagram. Snag and Tail trenches are just to the north of the mill and about half way towards the Butte itself. The Nose is the point where Snag and Tail trenches meet.
The first attack took place at 2.05pm on the 12th Oct. It was led by the 2nd SAI under Lt.Col. E. Christian with the 4th SAI under Major D.R. Hunt as a second wave of attack. Both met with impenetrable machine gun and rifle fire that made progress all but impossible in the grey all-encompassing fog and smoke from the barrage. In amongst all of this confusion communication was very difficult and the command was never in possession of the true position at any time. Neither unit even reached their first objectives. The 2nd and 4th SAI were withdrawn and replaced by the 3rd SAI under Lt.Col. Thackeray. The 2nd and 4th did not reach the safety of High Wood (south of the above diagram) until morning of the 13th Oct.
The 3rd SAI made an attack on The Pimple early on the night of 14th Oct and took it. They then launched an attack on Snag and Tail trenches with some success albeit with many casualties. On the 16th the 3rd SAI were relieved by the 1st SAI under Lt.Col. F.S. Dawson.
At 3.40am on the 17th three companies of the 1st SAI disappeared off into the grey morass in the direction of The Nose and were not heard of for several hours.
During the day of the 18th, patrols discovered the fates of “A”, “B” and “C” companies. It appeared that “C” company had been almost entirely wiped out. However “A” and “B” companies had reached Snag Trench (the first objective) without even realising it because of the mud but were cut off by Germans and were, almost to a man, killed. The patrols also determined that the key to success was the capture of The Nose and that, without that, progress would all but impossible.
At 5.45pm, Dawson ordered his “D” company under Capt. Langdale to attack from The Nose from The Pimple which the South Africans still held. They decided that the only way to approach the Nose was from Snag Trench. However, when he approached The Nose, Langdale did not feel strong enough to attack it and withdrew. Dawson ordered Langdale and his company back to Snag Trench. Brigadier Lukin ordered a fresh attack by a company of 4th SAI under Capt. Ross on the The Nose via Snag Trench and they reached the trench around 4.00am on the 19th. At 5.00am the enemy launched a devastating attack with bombs and flamethrowers and drove both companies out of Snag Trench.
A final attempt on Snag Trench was made on the 19th by a company from the 3rd regiment under Lt. Elliott but this, also, failed due to insufficient bombs and the 3′ deep mud causing utter exhaustion of the men.
Lt.Col. Dawson had not a single officer or man to order to make a further attack. At The Pimple there was no rifle left that could be fired. During the night of the 19th, the remnants of the South African Infantry Brigade was relieved by the 6th King’s Own Scottish Borderers and withdrew to High Wood.
There was much fallout in the upper commanding ranks as a result of the lack of planning and failure of the operation at the Butte de Warlencourt.
- Major General Furse G.O.C. 9th (Scottish) Division was deprived of his command on 4th December. He was appointed Master General of the Ordnance.
- Brigadier General H.T. Lukin (formerly O.C. South African Brigade) takes command of the 9th (Scottish) Division
- Lt.Col. F.S. Dawson (formerly of the 1st SAI) is promoted to command the South African Infantry Brigade
The Butte de Warlencourt was never captured during the course of the Battle of the Somme
Further reading
Wikipedia article about the attacks on the Butte de Warlencourt.
Pyramids and Poppies The 1st Infantry Brigade in Libya, France and Flanders 1915-1919 by Peter K.A. Digby. §16 The Butte de Warlencourt
The History Of The South African Forces In France by John Buchan. § IV. The Battle Of The Somme : The Butte De Warlencourt.
 button in the top right of the map display to select which years to display.